Save This Recipe
Embrace your sweet tooth with these irresistibly decadent Chocolate Toffee Thumbprints! They’re the perfect combination of a rich chocolate cookie, gooey toffee center, and a touch of sea salt for balance. Let’s whip up a batch!
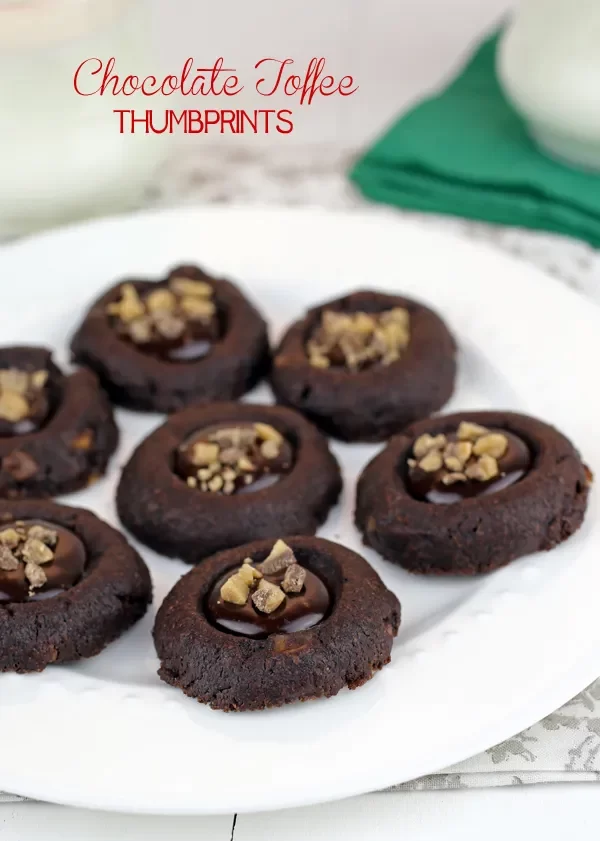
Toffee chips are speckled all through these chocolate thumbprint cookies with fudge ganache centers. They’re called thumbprints because you press your thumb into them to make a well for filling.
These little bites of decadence deserve a place on your holiday cookie platters! If they can last long enough after you bake them. They’re bursting with toffee flavor and the candy-like centers make them hard to resist.
The chocolate toffee dough is formed into balls first, the well is pressed out and then they’re chilled for a short time before baking. Chilling helps them keep their shape, though you may have to gently press the centers again when they come out of the oven. Not with your thumb this time. You can use the end of a wooden spoon or ice cream scoop.
The filling, a cross between a ganache and frosting, is spooned in later, after they’ve cooled off. It sets up well enough that you can stack them but stays fairly soft. It’s made with chocolate chips, heavy cream, a little butter and confectioners’ sugar.
This is the same high protein flour used by professional bakers and produces high, well-textured loaves of bread equally as well as it produces light, airy baked goods. It’s freshly milled from organic hard red wheat and both the bran and the germ have been removed leaving the endosperm that is made into white flour.
It isn’t enriched with any additives. I love that. This kitchen staple is incredibly versatile and perfect for all of your baking needs.
The Sweetest Little Twist: Make these Chocolate-Filled Cookies Your
Way Here’s the thing, though—there’s something
kind of magical about taking a bite into a cookie and finding that warm, gooey chocolate center waiting for you, like a hidden treasure inside. It’s the kind of moment that gives you pause, perhaps even makes you close your eyes a little.. But here’s the thing: no one cookie fits all. Whether you’re baking for picky kids, gluten-sensitive friends, or just plain ol’ craving something new, these little tweaks can turn your go-to treat into something extra special.. And trust me—I’ve spent enough time in the kitchen (and yes, occasionally sneaking bites of dough) to know that flexibility is a baker’s best friend. So let’s get into your most-asked questions about adapting this already-delicious cookie recipe to suit your taste, pantry, and preferences.
Can I Use a Different Type of Chocolate for the Filling?
Absolutely! While the original recipe calls for semisweet chocolate chips—because they strike a lovely balance between sweet and bitter—you’ve got room to play.
Want a richer, more grown-up flavor? Go with dark chocolate. I like something around 70% cacao for that deep cocoa taste that doesn’t overwhelm the cookie. Prefer something sweeter or making a batch for the kiddos? Milk chocolate will do the trick.
Just keep in mind: different chocolates melt a little differently. Dark chocolate tends to stay thicker and fudge-like, while milk chocolate can get a bit runnier. Nothing wrong with that—just different textures for different moods, you know?
What Is A Good Substitute For Toffee Bits?
Oh, the humble toffee bit. Buttery, toasty, and perfectly indulgent. But, hey, not everyone has a stash in their pantry. (Though I’ll tell you, I’m very bad at “measuring” and have been known to sneak a few direct from the bag.)
If you’re hoping to replace them, here are some delicious alternatives:
- Chopped nuts: Almonds, pecans or walnuts lend crunch and help balance the sweetness.
-
Chopped pretzels: Salty, crunchy, and honestly? A little addictive.
-
Crushed brittle or caramel candies: For that chewy-sweet combo.
-
Skor or Heath bar pieces: Basically fancy toffee bits in disguise.
You get the idea—play around! Baking is part science, sure, but it’s also part jazz. Improvise a little and trust your tastebuds.
Can I Make These Cookies Gluten-Free?
Yes ma’am, you sure can. These days, gluten-free flours have come a long way from the crumbly, flavorless blends of years past. Look for a gluten-free flour blend made specifically for baking—something that already includes xanthan gum or a similar binder, which helps mimic the structure that gluten would normally provide.
And if you’re really committed to the GF route, double-check your chocolate chips and any add-ins to ensure they’re certified gluten-free. You’d be surprised where sneaky traces of wheat can hide.
Bonus tip? Let your dough chill a little longer before baking—gluten-free doughs benefit from that extra resting time to hydrate properly.
How Should I Store These Cookies?
Now this is the kind of question that warms my heart—because it means you’ve got cookies to store, and that’s always a good day.
Here’s what I suggest:
-
Room temperature: Once the chocolate filling has set (about 30 minutes after baking), store the cookies in an airtight container. They’ll stay fresh and lovely for about five to seven days. That is, if they last that long.
-
Freezer-friendly: Want to stash some for later? These cookies freeze beautifully. Just let them cool completely, layer them between parchment in a freezer-safe container, and tuck them away for up to three months. When the craving hits, let them thaw at room temp or warm them gently in the microwave.
One little trick I swear by: place a slice of bread in the container to help keep the cookies soft. The cookies absorb the moisture from the bread—not the other way around!
My Cookies Spread Out While Baking. What Did I Do Wrong?
Ah, the dreaded cookie pancake situation. Been there. It usually comes down to one of two culprits:
-
Butter too soft or melted: If your butter is too warm when you start mixing, it’ll cause your cookies to flatten out. For better control, try using room temperature butter that still holds its shape when you press it.
-
Oven not preheated properly: Cookies need that burst of heat right away to hold their shape. Always let your oven fully preheat—and maybe even use an oven thermometer to double-check (some ovens fib a little on the temp).
Another handy tip? Chill your dough for 15–30 minutes before baking. It firms up the fat and gives your cookies a head start on holding their form.
Final Thoughts from the Cookie Corner
Cookies are one of those treats that carry a little bit of magic—equal parts comfort and creativity. And the best part? There’s no single “right” way to make them. Play with your ingredients, trust your instincts, and don’t be afraid to make a happy little mess along the way.
Because let’s be honest: the best cookies are the ones that taste like home—even if home is full of unexpected substitutions and a few chocolate fingerprints on the counter.
So preheat that oven, pull out your mixing bowls, and go bake some joy. You’ve got this.

CHOCOLATE TOFFEE THUMBPRINT
Ingredients
- 2 cups Bob's Red Mill Organic Unbleached All-purpose Flour
- ½ cup unsweetened Dutch-process cocoa powder
- ½ teaspoon salt
- 1 8 ounce bag milk chocolate toffee bits, divided
- 1 cup + 1 tablespoon butter at room temperature
- 1 cup sugar
- 1 large egg at room temperature
- 1 teaspoon vanilla extract
- Filling:
- 4 ounces semi-sweet chocolate chips
- 1 tablespoon butter softened
- ⅓ cup heavy cream
- ½ cup sifted confectioners’ sugar
Instructions
- Whisk the flour, cocoa, and salt together in a medium bowl. Add 1 cup of the toffee chips and toss with the flour mixture.
- In a separate large bowl beat the butter and granulated sugar together on medium speed about 2 minutes. Scrape down the sides of the bowl.
- Beat in the egg and vanilla.
- Add the flour mixture and mix with a spoon, once it thickens up you can gently knead it to evenly disperse the toffee chips.
- Roll the dough into 1-inch balls and place on a large parchment lined baking sheet. Use your thumb or the end of a wooden spoon or ice cream scoop to press a well into the center of each one.
- Refrigerate the cookies at least 30 minutes.
- Preheat the oven to 350 degrees F. Line a baking sheet or two with silpats or parchment and set cookies on it an inch apart (return the remaining unbaked cookies back to the fridge).
- Bake 8 - 9 minutes. Press the end of a wooden spoon or cookie scoop into the well in the center again, if needed.
- Cool completely on the baking sheet then transfer to wire racks. Repeat until all the cookies are baked.
Make the filling:
- Place the chocolate chips and butter in a small heat-proof bowl.
- Heat the heavy cream in a small saucepan over medium – high heat, stirring often, until it comes to a boil.
- Pour over the chocolate chips and cover the bowl tightly with aluminum foil. Let it sit five minutes.
- Whisk until the chocolate is completely melted and smooth.
- Add the sugar and whisk until smooth and creamy.
- Spoon into the wells of the cookies and sprinkle with the remaining toffee chips. Let set about 1 hour.
- Store well covered in a cool, dry place up to 1 week.
Notes
- Whisk the flour, cocoa, and salt together in a medium bowl. Add 1 cup of the toffee chips and toss with the flour mixture.
- In a separate large bowl beat the butter and granulated sugar together on medium speed about 2 minutes. Scrape down the sides of the bowl.
- Beat in the egg and vanilla.
- Add the flour mixture and mix with a spoon, once it thickens up you can gently knead it to evenly disperse the toffee chips.
- Roll the dough into 1-inch balls and place on a large parchment lined baking sheet. Use your thumb or the end of a wooden spoon or ice cream scoop to press a well into the center of each one.
- Refrigerate the cookies at least 30 minutes.
- Preheat the oven to 350 degrees F. Line a baking sheet or two with silpats or parchment and set cookies on it an inch apart (return the remaining unbaked cookies back to the fridge).
- Bake 8 - 9 minutes. Press the end of a wooden spoon or cookie scoop into the well in the center again, if needed.
- Cool completely on the baking sheet then transfer to wire racks. Repeat until all the cookies are baked.
- Place the chocolate chips and butter in a small heat-proof bowl.
- Heat the heavy cream in a small saucepan over medium – high heat, stirring often, until it comes to a boil.
- Pour over the chocolate chips and cover the bowl tightly with aluminum foil. Let it sit five minutes.
- Whisk until the chocolate is completely melted and smooth.
- Add the sugar and whisk until smooth and creamy.
- Spoon into the wells of the cookies and sprinkle with the remaining toffee chips. Let set about 1 hour.
- Store well covered in a cool, dry place up to 1 week.


