Save This Recipe
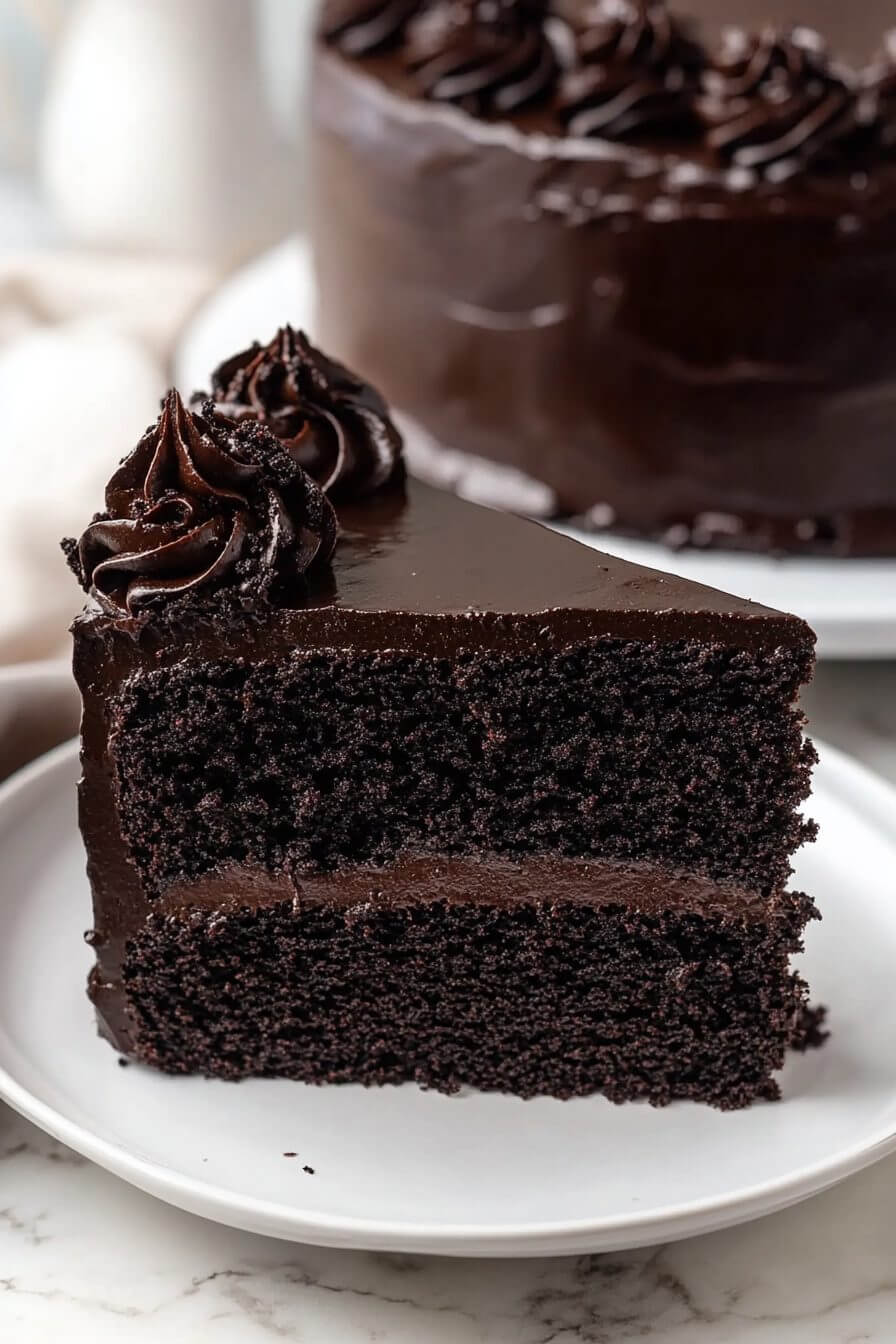
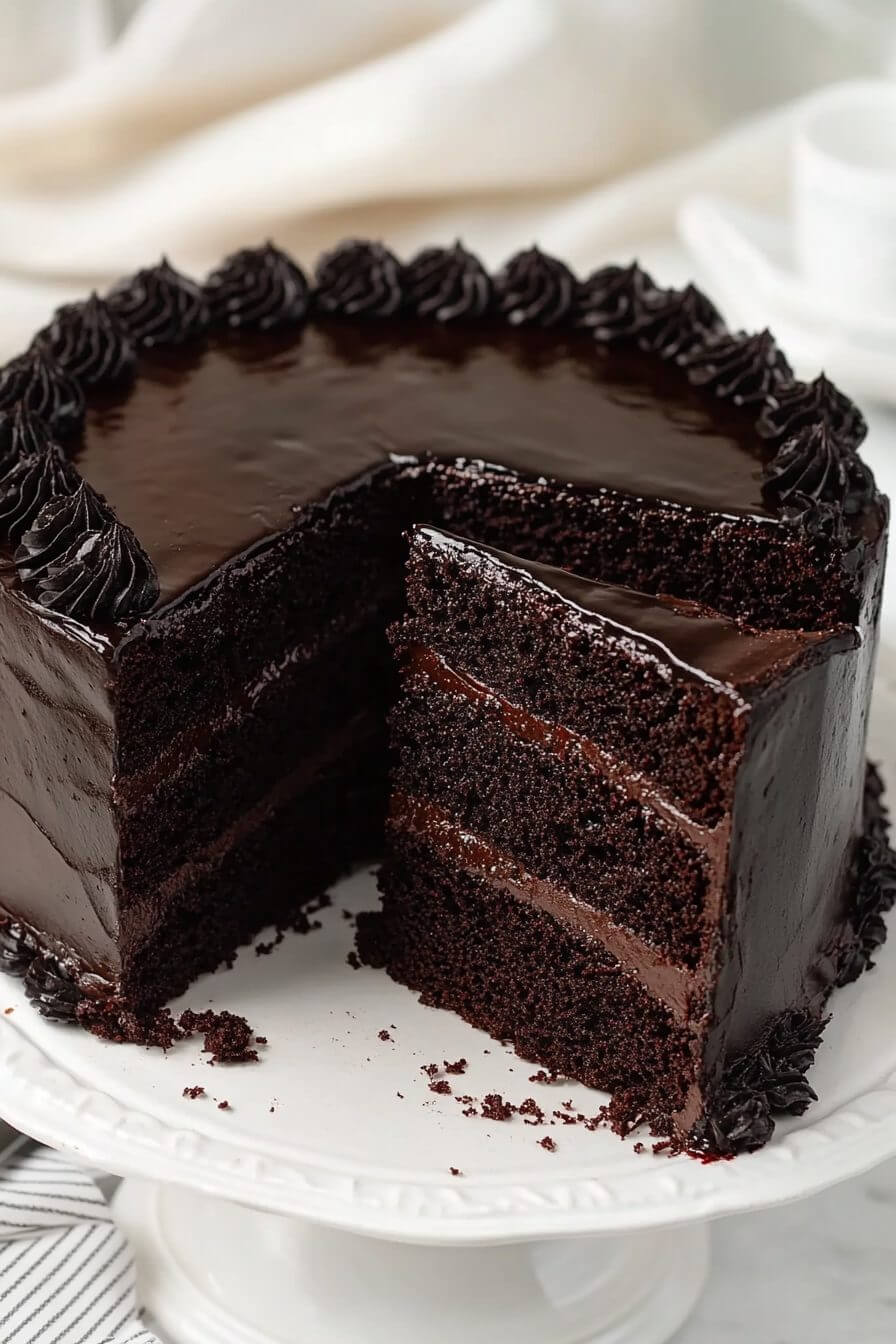
You know those desserts that just ooze a little extra drama? The kind of cake that makes everyone lean forward in their seat when it lands on the table? Well, let me tell you about my current baking obsession: Black Velvet Cake. Oh, let me warn you—this one has attitude! I still remember taking my first bite at a friend’s birthday party. The whole room went silent when she sliced it open. That deep, inky-black crumb was right out of a detective novel, but the taste? Pure velvet—meltingly tender, just enough tang, and the most craveable hit of chocolate. It was one of those close-your-eyes-and-sigh cake moments. Love at first bite, no joke.
Now, fast forward a few years and this cake has become my ace-in-the-hole when I want to turn a weeknight dinner into something special. The best part? It’s got a bakery look, but it’s made from pantry staples (not a drop of anything weird or fussy). My family’s officially hooked—and it’s not even tricky! I swear you don’t need a culinary degree to pull off this showstopper. Ready for a little kitchen magic?
Why You’ll Love It
- That striking, gothic-black color—honestly, it’s just fun. (Perfect for Halloween, birthdays, or any time you want dessert to make a statement!)
- The texture is something dreamy. That buttermilk, plus a little butter and oil, makes every bite incredibly moist and velvet-soft.
- All-out, “grown-up” chocolate flavor thanks to black cocoa powder—think Oreo cookies, but richer. (And zero bitterness!)
- No hard-to-find ingredients. If you’re not into hunting down specialty stuff, don’t worry—you can still make this cake delicious with the basics.
- Mix and match—switch out flavors, frosting, or get creative with swirls and spices. It’s like a blank (well, black) canvas.
- If you love getting compliments, watch out: this cake draws a crowd. I’ve fielded recipe requests for weeks after bringing it to a potluck!
Ingredients (and Some Nifty Swaps)
- All-purpose flour – Basic, reliable—gives the cake its soft structure. If gluten isn’t your thing, a good GF blend (the kind meant for cup-for-cup swaps) works pretty nicely here.
- Granulated sugar – Sweetness, of course! I’ve also tried half regular sugar and half brown sugar for a cozier, slightly denser crumb. For the adventurous, coconut sugar works too but gives a hint of caramel.
- Butter + vegetable oil – Butter brings flavor; oil keeps it luxuriously tender and helps it stay moist for days. Dairy-free? Sub in vegan butter or just use all oil. No problem.
- Eggs – Room temp eggs blend in way better. If you need eggless, a couple flaxseed “eggs” will hold things together (just know it’ll be a touch denser).
- Buttermilk – That signature “velvet” flavor and tenderness comes from buttermilk. If you’re out, just stir a healthy splash of lemon juice or vinegar into plain milk, let it sit for 5 minutes. Homemade hack, done!
- Black cocoa powder – Here’s where the magic happens. This ultra-dark cocoa brings that mysterious color and a big, bold chocolate taste reminiscent of those famous sandwich cookies. If you can’t track it down, use natural or Dutch process cocoa—the cake turns out dark brown and still super yummy.
- Unsweetened cocoa powder – Blending cocoa types gives a more layered chocolate flavor. No rules here!
- Vanilla extract – Don’t skip it—vanilla rounds out and softens all that chocolate.
- White vinegar – A splash reacts with the baking soda for extra “oomph” in texture. Plus, a little tang plays off the chocolate beautifully.
- Baking powder and baking soda – The duo makes sure your cake rises nice and tall and stays feathery-soft. That’s the velvet part.
- Fine salt – Makes every flavor pop. I love a little sprinkle of flaky sea salt on top too!
- Black gel food coloring – Go ahead, embrace the drama! Just a drop or two for the most inky-black crumb. Not a fan? Skip it—your cake will be a handsome dark brown instead.
Step-By-Step Directions
- Prep your pans. Set your oven to 350°F (that’s 175°C for my metric friends). Grease up two 9-inch cake pans like you mean it—I like lining the bottoms with parchment and dusting with a little flour for extra insurance. No one has time for stuck cake!
- Beat the butter and sugar. In your biggest bowl, beat the softened butter and sugar together until it’s pale and fluffy. It’ll take 3-4 minutes, and yes, this step matters! This is how you get that swoon-worthy crumb.
- Mix in oil, eggs, and the good stuff. Pour the oil in and beat to combine. Then add the eggs, one at a time, beating well after each. Now’s the time for your vanilla and vinegar, too. If it looks a little wonky—don’t panic! It’ll come together.
- Dry ingredients—whisk, whisk, whisk. In a separate bowl, whisk together flour, both cocoas, baking powder, baking soda, and salt. Bonus points for sifting, but a quick whisk works for this casual baker. (You want everything nice and even!)
- Add dry and wet alternately. With your mixer on low, add a third of your dry mix to the wet, then half the buttermilk. Repeat—another third of the dry, then the rest of the buttermilk, then the last of the dry mix. Stop as soon as it looks mostly combined! A few streaks are totally fine at this stage. Overmixing = tough cake.
- Dial up the drama (food coloring). If you’re using black gel coloring, add a few drops now. Stir gently just until it’s evenly black (or until your heart says yes!)—the color deepens as it bakes.
- Divide and smooth. Scoop the batter evenly into the prepared pans. (I eyeball it, but an ice cream scoop works wonders.) Smooth out the tops so your layers look nice and even out of the oven.
- Bake. Pop the pans on your oven’s middle rack. Bake for 25–30 minutes, or until a toothpick poked in the center comes out mostly clean (a few moist crumbs are perfect). If your oven’s a wild child, start checking at 22 minutes just to be safe.
- Cool. Let the cakes sit in their pans for about 10 minutes before turning them onto a rack to finish cooling. Walk away! Resist the urge to frost them until they’re room temp—hot cake + icing = heartbreak.
Variations & Twists
- Mocha magic: Dissolve a tablespoon of instant espresso powder into your cocoa powders if you want a deep coffee twist. (Pairs so well with chocolate ganache!)
- Subtle spice: A big pinch of cinnamon, or even a whisper of cayenne pepper, makes this cake extra memorable—especially if topped with cream cheese frosting.
- Red-and-black swirl: Save out a cup of batter, color it bright red (gel food coloring for best pop), and swirl it into the pan for a Valentine—or Halloween—vibe. Such a crowd pleaser!
- Cupcake style: Scoop the batter into lined muffin tins, about 2/3 full, and bake for 18–20 minutes. Portable velvet drama!
Storage & Reheating Tips
- Room temperature: Once cooled and frosted, cover the cake tightly and store on the counter for up to 2 days—unless you’re using cream cheese frosting, then slide it in the fridge.
- Fridge: This cake actually tastes even more moist after a rest in the fridge. Keep covered; it lasts up to 5 days. Let slices warm up on the counter for about 30 minutes before eating—the texture is best when it’s not super cold.
- Freeze it: Unfrosted cake layers freeze beautifully! Double-wrap in plastic and foil, stash away for up to 2 months, and thaw overnight in the fridge. Bring to room temp before frosting.
- Warm it up: A quick 10 seconds in the microwave brings back that fresh-baked magic. Trust me, it’s worth it for a little melty-icing moment!
FAQs
Do I need the black gel coloring?
Not at all! The black cocoa does plenty of work. Without food color, you’ll get something darker than your usual chocolate cake—an elegant deep brown. The coloring is just for “look at me!” drama.
Why two types of leaveners?
This combo is your ticket to that dreamy, velvet crumb. Baking powder gives you a reliable rise, while baking soda reacts with the acidity from buttermilk and vinegar for extra fluffiness.
Why did my cake sink?
That usually means it needed a few more minutes to bake (or maybe your oven runs a bit cool—ovens have moods, I swear). A cake tester or toothpick helps. If it’s mostly cooked, a little dip won’t hurt the taste—just add extra frosting and pretend it’s rustic!
Conclusion
So, are you ready to bring a little midnight drama to your kitchen? This black velvet cake is my go-to for wowing a crowd without breaking a sweat, and it always brings the “wow” factor—whether it’s a spooky Halloween, a cozy holiday, or just an ordinary Tuesday in need of sparkle. I can’t wait to find out if you fall as hard for this as my family did. Are you team cream cheese frosting, classic ganache, or going wild with peanut butter icing? Let’s talk cake in the comments! However you serve it, I hope it brings a little extra joy and a lot of comfort to your people. Happy baking, friend, and remember—it’s okay to make a little kitchen mess as long as you get cake at the end!

Black Velvet Cake
Ingredients
- 2 cups all-purpose flour for structure
- 1 cup granulated sugar adds sweetness
- 1 cup buttermilk for moisture and tang
- 1/2 cup unsalted butter softened, adds creaminess
- 1/4 cup vegetable oil for moistness
- 2 large eggs binds ingredients
- 2 tbsp black cocoa powder for color and intense chocolate flavor
- 1 tbsp unsweetened cocoa powder additional chocolate flavor
- 1 tsp baking powder leavening agent
- 1/2 tsp baking soda reacts with buttermilk
- 1/2 tsp salt balances flavors
- 1 tbsp white vinegar adds tenderness
- 1 tsp vanilla extract flavor enhancer
- black food coloring gel or paste for desired shade
Instructions
- Preheat oven to 350°F (175°C). Grease and flour two 9-inch round cake pans or line with parchment paper.
- In a large mixing bowl, beat softened butter and granulated sugar until light and fluffy, incorporating air.
- Add vegetable oil and beat until well combined to ensure moisture.
- Add eggs one at a time, then mix in vanilla extract and white vinegar.
- In a separate bowl, sift flour, black cocoa powder, unsweetened cocoa powder, baking powder, baking soda, and salt.
- Alternate adding dry ingredients and buttermilk, beginning and ending with dry ingredients, mixing until just combined.
- Add black food coloring a few drops at a time until desired shade is reached.
- Divide batter evenly between prepared pans and smooth tops with a spatula.
- Bake in preheated oven for 25-30 minutes or until a toothpick inserted into the center comes out clean.
- Cool cakes in pans for 10 minutes, then transfer to a wire rack to cool completely.


