Save This Recipe
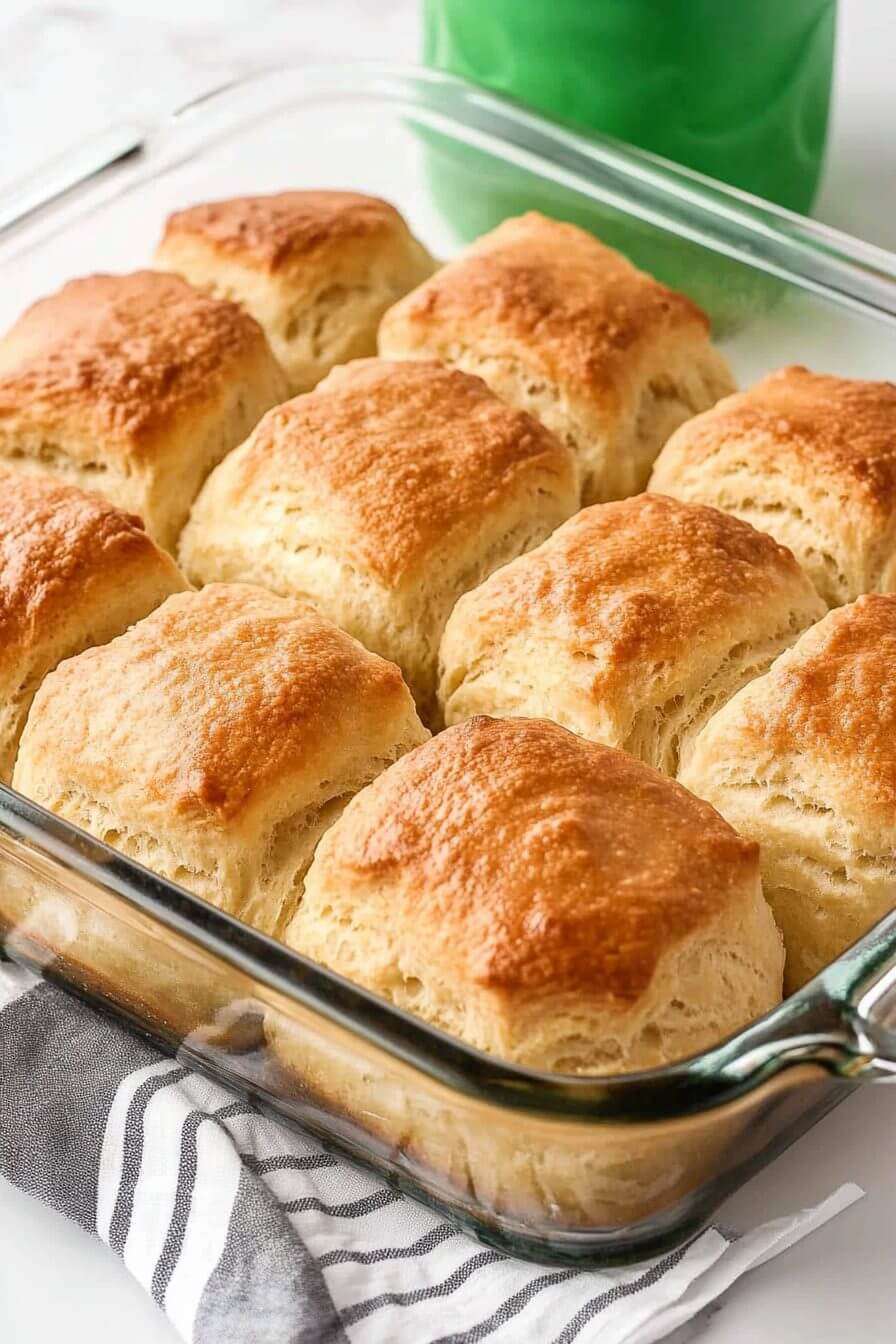
You know those mornings when you just need something warm and homemade, but your energy is, well… questionable at best? That’s usually me around 8 a.m. when the coffee’s still brewing and I haven’t quite convinced myself to scramble eggs, let alone tackle real biscuit dough. That’s where these Bisquick 7-Up Biscuits come to the rescue. Soft, fluffy, oh-so-buttery on the bottom, and honestly—almost too easy to believe. Sunday brunches, weeknight chili nights, even last-minute “oops, we need a side!” dinners… these little beauties have absolutely saved me more than once. Quick, simple, craveable. You know I love a kitchen shortcut, and this is one I’m not afraid to shout about!
With just four humble ingredients—Bisquick, sour cream, butter, and a can of 7-Up (yep, soda!)—you get biscuits that actually taste old-fashioned and homemade. The sour cream gives them that irresistible tang, the soda fluffs them right up, and the butter melts into this glorious golden crust. All-together now: swoon. Plus, you don’t need to get out your rolling pin or worry about cutting cold butter into flour (phew). These are the sorts of biscuits that disappear fast, so don’t blame me if you find yourself staring at the empty pan five minutes after pulling them from the oven.
Why You’ll Love It
- Pillowy & light: The 7-Up works some serious magic for that fluffy texture (try not to eat them all in one go…or do, I won’t judge).
- Buttery bottom crust: That layer of melted butter in the pan makes every biscuit golden and crisp underneath—it’s seriously addictive.
- Tangy flavor: Sour cream not only adds moisture but gives each bite a subtle, savory zip that keeps you coming back for more.
- Minimal mess, maximum reward: No rolling pins, no complicated steps, no need to chill anything—a simple stir, shape, bake, and done.
- Ultimate comfort food: Whether with honey, jam, sausage gravy, or (let’s be real) straight from the tray, these biscuits hit the spot every single time.
Ingredient Notes & Easy Swaps
Let’s keep it simple. Here’s what you’ll need—and a few friendly swap suggestions, because I know not everyone has the exact same shopping list every week!
- Bisquick Baking Mix: This is the base. If you don’t have it, make your own by combining all-purpose flour, a little baking powder, salt, and cut-in cold butter. It works in a pinch! (See below for details.)
- Sour Cream: This gives biscuits moisture and that signature tang. If you’re out of sour cream, plain Greek yogurt is a solid substitute (honestly, I do this all the time).
- 7-Up or Lemon-Lime Soda: Trust me—don’t skip this! The bubbles are what make these so fluffy. Sprite or even a store brand works if 7-Up isn’t in your fridge.
- Butter: Yes, you’re going big here. You want real, melted butter for that decadent, crisp base. Salted or unsalted both work. (I’ve… accidentally used both. Still delicious!)
If you ever find yourself without Bisquick, here’s the homemade blend I use: whisk together 4 cups of all-purpose flour with 1 tablespoon baking powder, 1 teaspoon salt, and 3 tablespoons cold butter (cut into flour with a fork or your fingers until the texture is like coarse sand). Presto—you’re ready to go!
Timing and Servings
- Prep time: Give yourself about 5 minutes to stir things together. It’s really that fast.
- Bake time: 10–12 minutes—just enough to clean up or make coffee before the timer dings.
- Makes: A solid dozen biscuits. Enough for a hungry family, or a few breakfasts if you hide a couple for later.
- Oven temp: Preheat to 425°F (220°C). That high heat is what gives you the rise and golden tops!
Step-by-Step Directions
This is where the “barely any effort” magic happens, friend! I’ve gotten these together before even finishing my first cup of coffee—so you know it’s easy:
- Set your oven to 425°F (220°C) and let it heat up while you pull ingredients. Pour that melted butter straight into a 9×13 baking pan (no parchment needed—just buttery goodness) and swirl it around to coat the bottom well.
- In a big mixing bowl, drop your Bisquick and dollop in the sour cream. Use a fork or pastry cutter to smush them together until the mix looks even and crumbly (it shouldn’t be perfect—rustic is totally fine!).
- Slowly pour in your 7-Up, using a spatula to fold it in. The dough comes together fast, so don’t overmix—just bring it together into a soft, slightly sticky ball. If it looks a tad shaggy, that’s actually what you want.
- Lightly flour your countertop with a little extra Bisquick. Dump the dough out and gently pat it (no heavy kneading needed—just smooth it out) into a rectangle about 1-inch thick.
- Grab a biscuit cutter—or honestly, a drinking glass dipped in Bisquick works fine!—and press straight down (no twisting, so the biscuits rise evenly). Set those cute little rounds right into the buttered pan with a smidge of space between each one.
- Slide the pan into the hot oven and bake for 10–12 minutes. When the tops are golden and you see butter bubbling up the sides, you’re in business. Let them cool for a minute (if you can wait that long), then lift out and serve warm.
- If you like a little extra flourish, brush the tops with melted butter or offer a little honey, jam, or even a swipe of cream cheese. Your kitchen will smell outrageously good—fair warning.
Variations for Every Mood
- Cheddar & Chive: Add a hearty ½ cup of grated sharp cheddar and a couple tablespoons of chopped chives to the dough before baking. Savory breakfast heaven.
- Garlic-Butter: Let a smashed clove of garlic hang out in your melted butter for a few minutes (then fish it out) before pouring into the pan—your biscuits will have that irresistible garlic bread aroma.
- Cinnamon-Sugar Sweet: Sprinkle a little cinnamon-sugar mixture over the top of your biscuits just before baking, or whip a flavored butter to spread on after. Weekend treat alert!
- Herb-Infused: Mix a teaspoon of dried rosemary or thyme into your Bisquick before you add the wet ingredients—super cozy for soup night.
- Add a Dash of Spice: A pinch of cracked pepper, or even a small handful of cooked bacon crumbles stirred in, will take these right into “craveable” territory.
Let your fridge (and your cravings) be your guide. This recipe is endlessly adaptable—don’t be afraid to play!
Storage & Reheating Tips
If, by some miracle, you actually have leftovers (rare at my house!), here’s how to keep those biscuits soft and “just-baked” delicious:
- Room temp: Store cooled biscuits in an airtight container for up to 2 days. Pop one in the toaster oven for a minute if it gets a bit firm.
- Fridge: They’ll keep for up to 4 days, but reheat gently (oven or microwave) for best texture.
- Freezer: Want to get ahead? Flash-freeze individually, then store in a freezer bag. Bake straight from the freezer at 350°F for 12-15 minutes—you know, for emergency biscuit situations.
- Reheat like a pro: Wrap in foil and bake at 350°F for a few minutes to bring back that buttery bottom, or if you’re short on time, microwave for 15-20 seconds (works like a charm before work or school).
FAQs
Can I use Greek yogurt instead of sour cream?
Oh yes, I do it all the time. Your biscuits will still bake up super tender, just a teeny bit heartier.
What if I’m out of Bisquick?
No worries—stir together 4 cups all-purpose flour, 1 tablespoon baking powder, 1 teaspoon salt, and 3 tablespoons cold butter (cut in finely). Use just like the mix!
Why lemon-lime soda instead of milk?
It’s all about the bubbles! 7-Up gives these their sky-high lift and just a touch of sweetness you can’t get with plain milk.
Can I make these gluten-free?
Absolutely. Use your favorite gluten-free baking mix—it works beautifully (and no one I’ve baked for has noticed the difference…not once).
Are they freezer-friendly?
You bet! Cool them completely, flash-freeze, then store in a zipper bag. They reheat like a dream—breakfast hero status, unlocked.
Conclusion
Sometimes the best comfort food is the kind that looks fancy but takes zero effort and leaves your kitchen smelling like a bakery. These Bisquick 7-Up Biscuits are one of my “old standby” recipes and, honestly, I never get tired of sharing them—or eating them! Whether you’re a biscuit beginner or a breakfast pro, this is the kind of recipe that makes you feel like a star, no matter what kind of week you’ve had. If you give them a try (or add your own twist!), I’d love to hear all about it in the comments. Happy biscuit baking, friend—may your butter always be melty and your mornings cozy!

Buttery Bisquick 7-Up Biscuits
Ingredients
- 4 cups Bisquick baking mix
- 1 cup sour cream
- 1 cup 7-Up
- 1/2 cup butter, melted
Instructions
- In a large bowl, combine Bisquick baking mix and sour cream. Mix until well combined. Gradually add 7-Up, stirring until you have a soft dough.
- Lightly flour a surface with some additional Bisquick mix. Knead the dough gently, folding it a few times to ensure it’s well-coated with the baking mix. Pat the dough out to a thickness of about 1 inch.
- Use a round biscuit cutter or cookie cutter to cut the dough into biscuit shapes.
- Melt butter and pour it into the bottom of a cookie sheet or 9x13-inch casserole dish.
- Arrange the biscuits on top of the melted butter in the pan. Bake at 425°F (220°C) for 12-15 minutes, or until the biscuits are golden brown.
- Serve the biscuits warm with a pat of butter or your favorite spread. Enjoy!


